
There are several ways to create a new Flutter project. In this post, I am going to share various methods one can use to create a new Flutter project.
The easiest way is to create a Flutter project by using the command line. Based on your requirements, the command to create a new flutter project can take some parameters. Both with and without parameters are shown below.
Create New Flutter project using command line (with parameters)
flutter create --org com.yourdomain your_app_nameThis command will create a simple starter app known as Simple Counter App which basically increments counter based on button clicks.
If you want a more advanced template (with a ListView / DetailView / Settings / Theme switch) that follows community best practices run the command (only since the Flutter 2.5 version):
flutter create --org com.yourdomain -t skeleton your_app_nameSwift, Kotlin, and androidx dependencies are the default options
After just opening the created project in Android Studio or in VSCode
Parameter --org com.yourcompany will form applicationId for Android as:
com.yourcompany.yourappnameand iOS PRODUCT_BUNDLE_IDENTIFIER as:
com.yourcompany.yourAppNameTo explore all possible parameters type
flutter create --helpCreate New Flutter project using command line (without parameters)
flutter create your_app_nameIt is more straightforward here. The project will be created without assigning applicationId for Android and iOS PRODUCT_BUNDLE_IDENTIFIER.
As discussed in the previous method to create a new project, this command will also create a simple starter app known as Simple Counter App which basically increments counter based on button clicks.
New Flutter Project using VS Code
To create a Flutter project in VS Code, an official Flutter extension should be installed in your VS Code.

Note: To install Flutter extension in VS Code, Ctrl + Shift + x on Windows or Command (or Cmd) ⌘ + Shift ⇧ + x on Mac and search for ‘flutter‘ and click install.
To create a new project in VS Code:
- Open Command Palette under View menu (or Ctrl + Shift + p on Windows or Command (or Cmd) ⌘ + Shift ⇧ + p on Mac)
- Search for “Flutter: New project” and press Enter
- Select Project or Module or Package or Skeleton based on your requirement. Here we are going to create a new project. So, keep “Project” selected and press Enter. (By default, Project is selected in VS Code.)
- Select folder or directory where you want to create the project
- Input project name and press Enter
- Now your project is created
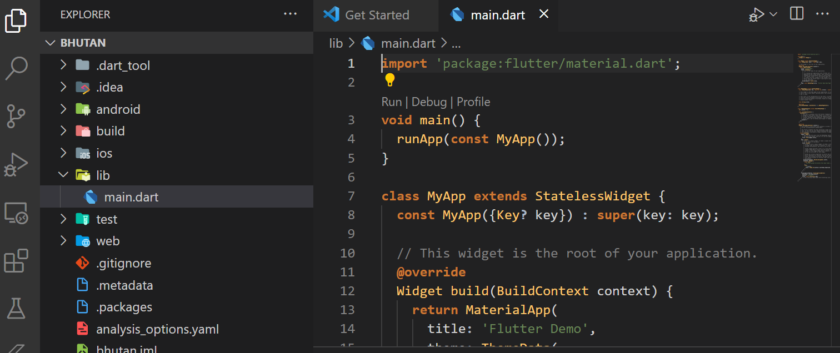
Run your Flutter Project in VS Code
Run | Debug | Profile options will be displayed above your main method as shown in the screenshot given below. Click Run to run your new project.
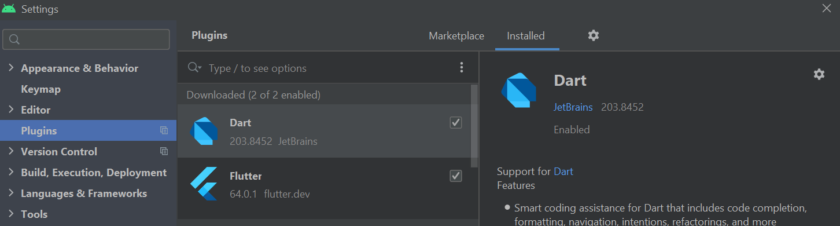
New Flutter Project using Android Studio
The process is pretty similar to creating a new project using VS Code. From the plugins marketplace, install Dart and Flutter plugins.
- Select File > New Flutter project
- Select Flutter SDK and click Next
- Enter Project Name, Project location, Description of the project, and other options which are pretty self-explanatory.
- And Click Finish.
- Your new project is ready.
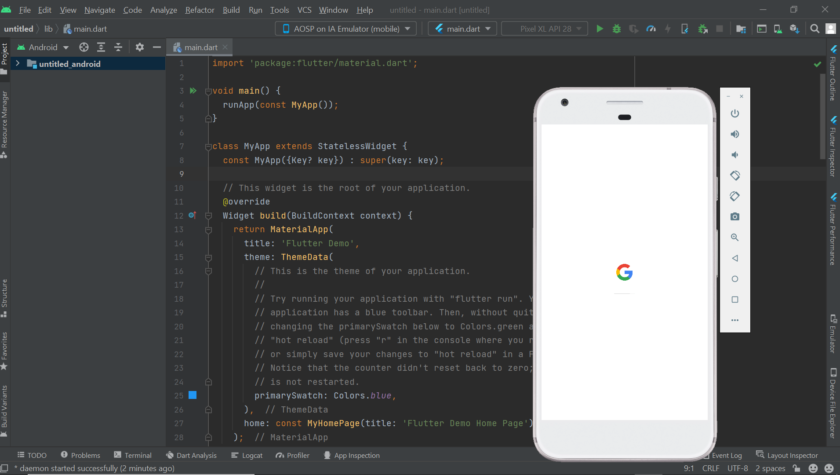
Run your Flutter Project in Android Studio
- Select the connected device, emulator or browser and Click run button. That’s it.
Note: If you want to keep your emulator on top of the screen or any other opened software, refer to the tutorial here: How to keep an android emulator always on top of your screen
If you come across any issues, comment below. I will be more than happy to get in touch with you help you.